
アプリ開発日誌
2017.02.14
Android Studioのmoduleのbuild.gradleを分割してみる
おはようございます。プログラマーの小林です。
さて、本日のテーマは「Android Studioのbuild.gradleを分割する」です。
アプリケーション開発をする上で、ビルドファイルをいじるというのは避けて通れません。
今回はそのビルドファイルを分割して、処理をモジュール化してみましょう。
build.gradleは分割できる
最近、ビルドファイルがやたら長くなってしまい、「可読性低いなぁ」と思うことがありました。
そこで、Gradleのリファレンスを参考に、プロジェクトのビルドファイルを分割してみました。
簡単かつ手軽にできるので、皆さんも是非やってみましょう。
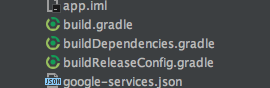
プロジェクトの構成
今回のプロジェクトの構成は以下の通りです。
-project
–app
—src
—-debug
——AndroidManifest.xml
—-develop
——AndroidManifest.xml
—-main
—-release
——AndroidManifest.xml
—-build.gradle
ビルドファイル
今回の分割前のビルドファイルの中身です。
apply plugin: 'com.android.application'
apply plugin: 'ライブラリのプラグイン'
import java.text.SimpleDateFormat
import java.util.regex.Pattern

def VERSION_NAME = "1.0.0"

android {
    compileSdkVersion 25
    buildToolsVersion "25.0.2"

    signingConfigs {
        develop {
            storeFile file(devKeystore)
            keyAlias devKeyAlias
            storePassword devKeyPass
            keyPassword devKeyAliasPass
        }
    }

    defaultConfig {
        applicationId "パッケージ名"
        minSdkVersion 19
        targetSdkVersion 25
        versionName VERSION_NAME
        testInstrumentationRunner "android.support.test.runner.AndroidJUnitRunner"

        // サポートする言語のリソースのみ保持
        resConfigs "ja"
    }

    buildTypes {
        debug {
            shrinkResources true
            minifyEnabled true
            applicationIdSuffix ".debug"
            proguardFiles getDefaultProguardFile('proguard-android-optimize.txt'), 'proguard-rules.pro'
            testProguardFiles getDefaultProguardFile('proguard-android-optimize.txt'), 'proguard-test-rules.pro'
            zipAlignEnabled true
        }
        develop {
            debuggable true
            shrinkResources true
            minifyEnabled true
            signingConfig signingConfigs.develop
            proguardFiles getDefaultProguardFile('proguard-android-optimize.txt'), 'proguard-rules.pro'
            zipAlignEnabled true
        }
        release {
            debuggable false
            shrinkResources true
            minifyEnabled true
            proguardFiles getDefaultProguardFile('proguard-android-optimize.txt'), 'proguard-rules.pro'
            zipAlignEnabled true
        }
    }

    // Releaseでビルドバージョンを自動インクリメント
    task('incrementVersionCode') << {
        // AndroidManifest取得
        def manifestFile = file('src/release/AndroidManifest.xml')
        def manifestText = manifestFile.getText();
        // versionCodeの記述を検索
        def pattern = Pattern.compile("versionCode=\"(\\d+)\"")
        def matcher = pattern.matcher(manifestText);
        matcher.find()
        def versionCode = Integer.parseInt(matcher.group(1));
        // versionCodeの値を更新
        versionCode++;
        def resultManifest = matcher.replaceAll("versionCode=\"" + versionCode + "\"")
        manifestFile.write(resultManifest);
    }
    // Debugビルドでエラーが出ないようにReleaseビルドの時のみ上記のタスクを実行
    tasks.whenTaskAdded { task ->
        if(task.name == 'generateReleaseBuildConfig') {
            task.dependsOn 'incrementVersionCode'
        }
    }

    // release版のapkファイル名を変更
    applicationVariants.all { variant ->
        if (variant.buildType.name.equals('release')) {
            variant.outputs.each { output ->
                if (output.outputFile != null && output.outputFile.name.endsWith('.apk')) {
                    def date = new SimpleDateFormat("yyyyMMdd_HHmmss").format(new Date())
                    def filename = "app_${date}.apk"
                    output.outputFile = new File(output.outputFile.parent, filename);
                }
            }
        }
    }
}

dependencies {
    compile fileTree(dir: 'libs', include: ['*.jar'])
    androidTestCompile('com.android.support.test.espresso:espresso-core:2.2.2', {
        exclude group: 'com.android.support', module: 'support-annotations'
    })

    testCompile 'junit:junit:4.12'

    // support libraries
    compile 'com.android.support:appcompat-v7:25.1.1'
    compile 'com.android.support:recyclerview-v7:25.1.1'
    compile 'com.android.support:support-fragment:25.1.1'

    // google play services
    compile 'com.google.android.gms:play-services-ads:10.0.1'
    // firebase-messaging
    compile 'com.google.firebase:firebase-messaging:10.0.1'

    // 40行ほどライブラリの記述
}

apply plugin: 'com.google.gms.google-services'
なかなかの長さですね。使用するプラグイン(DeployGateなど)によってはもっと長くなります。
ファイルを編集するときに何度もスクロールしなければならないので、結構面倒です。
それでは、ファイルを分割していきましょう。
1.releaseビルドの処理を分割
android内に定義されているreleaseビルドに関する処理を分割してみましょう。
まずbuild.gradleと同じディレクトリに新しいビルドファイルを作成します。
buildReleaseConfig.gradleとでもしましょうか。
中身は以下のようになります。
import java.text.SimpleDateFormat
import java.util.regex.Pattern

android {
    // Releaseでビルドバージョンを自動インクリメント
    task('incrementVersionCode') << {
        // AndroidManifest取得
        def manifestFile = file('src/release/AndroidManifest.xml')
        def manifestText = manifestFile.getText();
        // versionCodeの記述を検索
        def pattern = Pattern.compile("versionCode=\"(\\d+)\"")
        def matcher = pattern.matcher(manifestText);
        matcher.find()
        def versionCode = Integer.parseInt(matcher.group(1));
        // versionCodeの値を更新
        versionCode++;
        def resultManifest = matcher.replaceAll("versionCode=\"" + versionCode + "\"")
        manifestFile.write(resultManifest);
    }
    // Debugビルドでエラーが出ないようにReleaseビルドの時のみ上記のタスクを実行
    tasks.whenTaskAdded { task ->
        if(task.name == 'generateReleaseBuildConfig') {
            task.dependsOn 'incrementVersionCode'
        }
    }

    // release版のapkファイル名を変更
    applicationVariants.all { variant ->
        if (variant.buildType.name.equals('release')) {
            variant.outputs.each { output ->
                if (output.outputFile != null && output.outputFile.name.endsWith('.apk')) {
                    def date = new SimpleDateFormat("yyyyMMdd_HHmmss").format(new Date())
                    def filename = "app_${date}.apk"
                    output.outputFile = new File(output.outputFile.parent, filename);
                }
            }
        }
    }
}
リリースビルド時の処理を分割しました。込み入った処理が多いので分割できると嬉しいですね。
2.ライブラリ定義を分割
dependenciesを別ファイルに定義してみましょう。
この部分は込み入った処理はないのですが、単純に長くなりがちなので、
分割できるとbuild.gradleがすっきりします。
build.gradleと同じディレクトリに新しいビルドファイルを作成します。
buildDependencies.gradleとでもしましょうか。
apply plugin: 'ライブラリのプラグイン'

dependencies {
    compile fileTree(dir: 'libs', include: ['*.jar'])
    androidTestCompile('com.android.support.test.espresso:espresso-core:2.2.2', {
        exclude group: 'com.android.support', module: 'support-annotations'
    })

    testCompile 'junit:junit:4.12'

    // support libraries
    compile 'com.android.support:appcompat-v7:25.1.1'
    compile 'com.android.support:recyclerview-v7:25.1.1'
    compile 'com.android.support:support-fragment:25.1.1'

    // google play services
    compile 'com.google.android.gms:play-services-ads:10.0.1'
    // firebase-messaging
    compile 'com.google.firebase:firebase-messaging:10.0.1'

    // 40行ほどライブラリの記述
}

apply plugin: 'com.google.gms.google-services'
この部分も分割できるんですね。これで必要な部分は全て分割し終わりました。
3.分割された後のbuild.gradle
さて、ファイルを分割しましたが、このままではビルドの定義に加わっていません。
gradleのモジュールを追加するには、以下の宣言をする必要があります。
apply from: 'yourFileName.gradle'
それでは早速使ってみましょう。
apply plugin: 'com.android.application'

def VERSION_NAME = "1.0.0"

android {
    compileSdkVersion 25
    buildToolsVersion "25.0.2"

    signingConfigs {
        develop {
            storeFile file(devKeystore)
            keyAlias devKeyAlias
            storePassword devKeyPass
            keyPassword devKeyAliasPass
        }
    }

    defaultConfig {
        applicationId "パッケージ名"
        minSdkVersion 19
        targetSdkVersion 25
        versionName VERSION_NAME
        testInstrumentationRunner "android.support.test.runner.AndroidJUnitRunner"

        // サポートする言語のリソースのみ保持
        resConfigs "ja"
    }

    buildTypes {
        debug {
            shrinkResources true
            minifyEnabled true
            applicationIdSuffix ".debug"
            proguardFiles getDefaultProguardFile('proguard-android-optimize.txt'), 'proguard-rules.pro'
            testProguardFiles getDefaultProguardFile('proguard-android-optimize.txt'), 'proguard-test-rules.pro'
            zipAlignEnabled true
        }
        develop {
            debuggable true
            shrinkResources true
            minifyEnabled true
            signingConfig signingConfigs.develop
            proguardFiles getDefaultProguardFile('proguard-android-optimize.txt'), 'proguard-rules.pro'
            zipAlignEnabled true
        }
        release {
            debuggable false
            shrinkResources true
            minifyEnabled true
            proguardFiles getDefaultProguardFile('proguard-android-optimize.txt'), 'proguard-rules.pro'
            zipAlignEnabled true
        }
    }
}
apply from: 'buildReleaseConfig.gradle'
apply from: 'buildDependencies.gradle'
「android」の部分がbuild.gradleと他ファイルで存在しますが、ビルド時に処理はマージされます。
これでビルドファイルの分割は完了です。
注意
新しく作成したファイルですが、build.gradleと異なり、
編集した時にプロジェクトと同期する通知が出ません、
なので編集した時はAndroid StudioのToolbarの
「Sync Project With Gradle Files」を押して同期しましょう。
まとめ
いかがでしたでしょうか、いつものようになかなか地味な内容だったかと思います。
こういった作業はプロダクトの出来に直接関係があるわけではありませんが、
開発をする上で、こういった作業は後々の効率の面でとても重要になります。
例えば、「この処理、簡単に別プロジェクトで使いまわしたいなぁ」と思った時などですね。
皆さんもビルドファイルをいじり倒して、開発を効率化しましょう!